| READ BEFORE INSTALLATION – Any persons assembling these products (contract installers, employees and other personnel) must provide this product guide to those persons, store manager, site or maintenance supervisor etc. Read the instructions thoroughly before assembly, all product questions can be directed to VIP Customer Service, (888) 521-0328 Office hours are M-F 9am -6pm PST. |
Items:
LED Post, Ball Top, LED Base, 10 ft Connector, Adapter, Remote Control, Sand Bags
POWER REQUIREMENT:
(a) Working voltage: DC 4.5~5V.
(b) Direct Current: 1.2~2A
(c) Current Consumption: DC 100~500mA; Average Current Consumption: DC 300mA
(d) Average Power Consumption: 3W
LED Lighted Stanchion instruction Manual: |
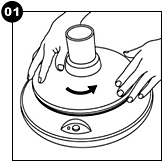
1. Remove the cap cover by turning it counter clockwise. |
 2. Place 3 size-D batteries into the cell box according to the positive (+) and negative (-) indications shown on the cell box. |
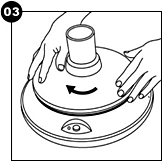
3. Replace the cap cover by turning it counter clockwise. |
 4. Plug the electric wire into the PC board located at the bottom of the LED post. |
| |
 5. Attach the LED post to the base. Once fasten correctly, a click should be heard. |
 6. Place the plastic head on top of the LED post. |
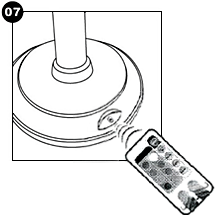 7. Press any button from the remote control to start your LED lighted stanchion (up to 15 feet).
 |
Note:
a. To avoid any failure, turn off the power before disassemble. |
LED AC/DC Adapter & Serial Cable:: |
 Connect the AC/DC adapter (included) |
 AC/DC adapter: For best lighting quality, limit your connection up to 6 stanchions with serial cable. |
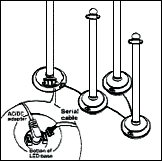
Batteryr: For best lighting quality, limit your connection up to 4 stanchions with serial cable. |
Note:
a. For safety consideration, please remove all batteries from the cell box before plug into a socket.
b. serial cable ONLY provide connection up to 6 stanchions. |
Weight Bag Instruction: |
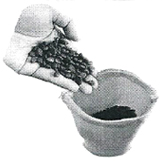
Fill weight bags with either gravel or sand.
(Note: Limit each bag to 5 - 1/2 lbs) |
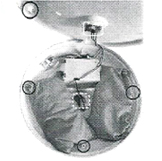
Flip the LED base upside down and unscrew the base cover. Gently place the weight bags in the open areas, make sure to avoid blocking the screw holes and hitting the wires. |
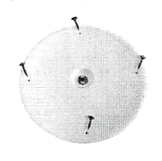
Place the base cover back and align the screw holes. After tighten the screws, your LED lighted stanchion is ready to use. |
Notice: For safety issue, please remove all
batteries from the cell boxes before using AC/DC adapter |